A collaborative working environment requires you to share your worksheet with other users. You might be hesitant to share if it contains sensitive data you must keep secure. In that case, you can lock the private data cells before sharing the worksheet.
The benefit of locking a cell is that you cannot change its contents. It also prevents unauthorized access by protecting the cells. Additionally, you can protect the worksheet by providing a password.
Locking the cells in the worksheet will protect it from tampering, and you will need to unlock them before you start working on the worksheet.
Microsoft Excel 2016 and its earlier versions provide the ability to lock cells or protect cells to prevent them from getting modified. In this guide, you will look at ways to lock the entire worksheet, a specific cell, or a cell that contains a formula.
How To Lock Cells in Excel?
By locking the cells, you protect against unwanted alteration to the values in the cells. But what would you do when you wish to lock a specific cell, row, or column?
By default, the Locked option is enabled in the Excel worksheet. You need to unlock it first to perform the desired operation, such as locking the entire worksheet, locking a specific cell, or locking all the cells.
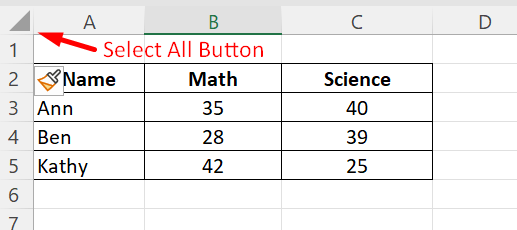
- Press Ctrl+A or the Select All button at the top left corner of the sheet, as seen below.
- Select the cells and right-click on them. In the menu, select Format Cells. Then select the tab Protection, uncheck the Locked option, then click OK.
- To lock a cell or a range of cells, a column, or a row, select the desired area using the mouse or the Shift+ arrow keys.
- There's another way to select a column. Select the first cell in the column and then press Ctrl+Space or click on the column header to find the entire column selected.
- To select two columns or more, select a column and drag the selection either left or right to select the adjacent ones.
- With the required cells selected, right-click on it or press Ctrl+1 to open the Format Cells window. Choose the Protection tab, and check the Locked box.
- Click OK.
- The final step is to protect the sheet, as the lock option does not have an effect until you protect the worksheet.
- To protect the worksheet, select the Review tab → Protect Sheet.
- The Protect Sheet window opens and prompts you to enter a password. Enter a password of your choice and click OK.
- Reconfirm the password and click OK.
- Now, try to edit the column which you have locked. You will be prevented from editing the cell, and Microsoft will display a warning message.
- You can still edit any cells that have not been locked.
A key takeaway from this section is that you can follow either of the two ways to lock cells in Excel.
- Home →Format → Format Cells → Protection.
- Right-click on a cell, and select Format Cells → Protection.
How To Unlock Cells in Excel
To unlock your worksheet or specific cells, go to the Review tab, select Unprotect Sheet, and enter the same password. The protection has been removed, and you can edit any of the cells, even the column you had locked.
How to Lock Cells That Contain a Formula
Not just the cells, but you can lock the cells that contain the formulas to avoid getting manipulated. To do that, follow these steps.
- First, unlock all the cells using the steps discussed in the previous section.
- Since the worksheet is locked by default, uncheck the Locked option in the Format Cells dialogue box before locking the cells containing a formula.
- Select the Home tab and Find & Select in the Editing group.
- The Go-To dialogue box opens. In that, choose the option Formulas and click OK.
- Again, you need to protect the sheet by supplying a password.
- Now, try editing the cells that contain the formulas. You won’t be able to.
In the above example, the columns containing the marks in the subject Math are locked, and the columns containing the formulas, columns D and E, are also locked.
After the sheet is protected, the cells in columns B, D, and E cannot be modified, whereas the unlocked column C can be modified.
How to Lock a Range of Cells Using a Password
If you were reading this guide from the beginning, you would have understood how to lock and unlock a cell. In a locked and protected worksheet, you will learn how to access and modify a specific cell, column, or row.
You can allow certain trusted users or someone who needs access to the worksheet to edit the cells. Follow these steps to enable a user to work on a protected worksheet.
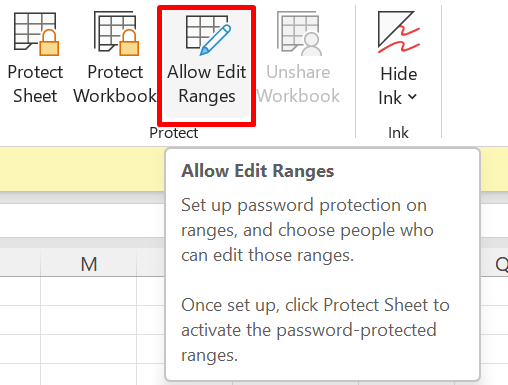
- Go to the Review tab and click Allow Edit Ranges, as shown in the image below.
- Before enabling this feature, ensure the sheet is in unprotected mode. Select Review → Unprotect Sheet, and enter the password to remove the protection.
- Click the New button to add a new range in the Allow Edit Ranges dialogue box.
- Enter the relevant information in the field:
- In the Title box, enter a name appropriate to the information you intend to lock.
- In the Refers to Cells field, enter a cell or range reference. If you have selected the columns, their respective cell addresses will automatically be entered; otherwise, you must manually select them.
- In the Range password box, type a password. If you leave this box empty, everyone can edit the range without a password.
- Click OK.
- After setting the password, you can edit a range of cells or a column in a protected worksheet using this password, as shown below.
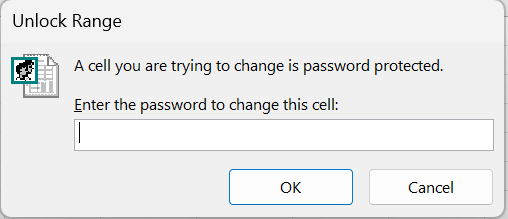
This is how a worksheet can be password-protected and allow certain users to access specific cells using a password you supplied for that range. Users with that password can edit or delete the cell's contents.
How To Lock the Entire Worksheet in Excel
If you wish to lock the entire worksheet, you can do it in three steps.
- Ensure that the default Locked box is unchecked.
- Select the entire worksheet by pressing Ctrl+A or the Select All button at the top-left corner of the worksheet.
- Either press Ctrl+1 or right-click on any of the cells to open the menu.
- Select the Format Cells and choose the Protection tab.
- Check the Locked box and click OK.
- Go to the Review tab, select Protect Sheet, provide the password, and re-confirm it to protect the worksheet.
Frequently Asked Questions
1. How do I lock specific cells in Excel?
You can lock specific cells by selecting a particular cell, column or row. Then right-click on it and select Format Cells, which opens a window. There, select Protection and check the Locked box.
After that, protect the worksheet by selecting Review → Protect Worksheet. Provide a suitable password in the window, then re-confirm and click OK.
If you attempt to edit that particular cell, column, or row, you will get an alert message that it is protected, as shown below.

2. How to lock the formula cells but allow access to users for entering data?
To lock formulas in the worksheet, go to Home → Find & Select → Go To Special → Formulas. Click OK. Protect the sheet by selecting Review → Protect Sheet to complete the action.
Enter the password twice to reconfirm it, and now check by altering the formula field. You will not be able to do it. You will still be able to edit the other cells that contain data.
Final Thoughts
Sometimes, you want to lock specific cells from being changed but still want to allow users to adjust other cells in a worksheet.
Locking cells in Excel is an essential tool, as it prevents unauthorized alteration of important values and formulas. This article explained how to lock a specific cell, an entire worksheet, or a cell with a formula. Check out “The Top 5 Excel Functions to Make Work Easier” to master new skills in Excel.
You can also check out our Microsoft Excel Courses to learn more about Excel functions and formulas. You can also visit our website and get your certification in Microsoft Office and Microsoft Word.